Well, now that we know she runs… Its time to start hacking! This is more of an investment in my ‘future’ here. My end all plan for this truck has changed a bit. Initially, I wanted to follow my child hood dream of slamming the dime and making an LS powered, pavement pounder… but with fuel at nearly $4/gal and with how DAMN loyal this truck is… the new plan is to create a bad ass ‘Deathtrap Custom shop truck’. So pretty much: bag it (eventually) but keep the axle outa the bed. I may window the floor a bit to let the diff play peek-a-boo a bit, but thats it. I want full use of the bed. Annnyyywwhhhooo…. that means I only need to notch the frame a bit, no massive Brooklyn Bridge (we save that shit for shoeboxes with trucks big enough for ALLL the dead hookers). Lets get at it!
Measure (boooo, I know)
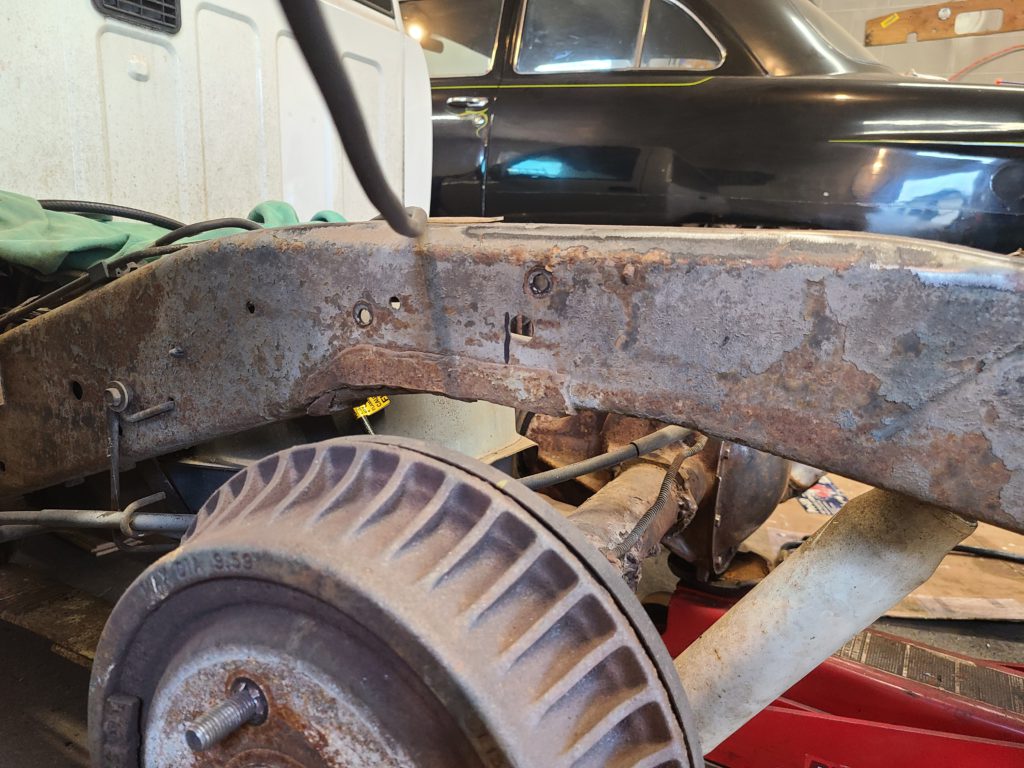
So.. I’d love to make some sorta joke about how I half assed this, but… I’m anal as hell, sooo no. I measured the fuck out of this. Finding center on a frame, for a axle that you anticipate traveling ‘through’ the existing frame, can be a pain in that ass. Here’s how i like to do it… your results may very.
‘in best announcer voice’ – Here at DTC, we take safety serious, sorta.
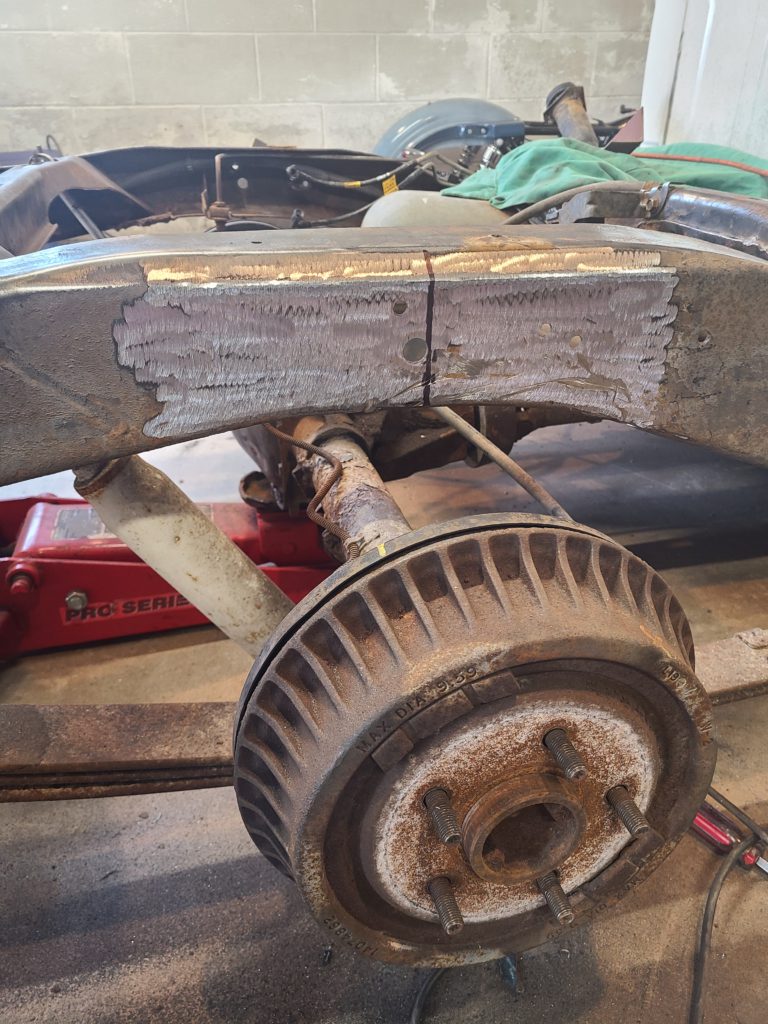
Rule #1, NEVER trust the bump stop. I’ve never notched a car where the bump stop was in the real ‘center’. Drop a plumb bob drown the frame and hit the ‘center’ of your axle at vehicle ride height. Yes, this assumes you have the stock suspension still in place. This is your ‘neutral’ mark. Depending on what type of suspension you plan on running, this might be all u need. If you’re running a triangulated setup and the axle isn’t expected to have much if any front/back motion, have a beer, you’re done. If you’re math/space challenged like my dumbass and you plan on running some form of a parallel link system, sorry.. beers are for closers.
Try to figure out how much your axle will pull fwd at full compression, usually this requires you to know your link length, etc… at least make a best guess.
Once you have that number, subtract that from your ‘neutral’ mark and put a 2nd sharpie mark on the frame. The goal is to have the axle centered at full compression.
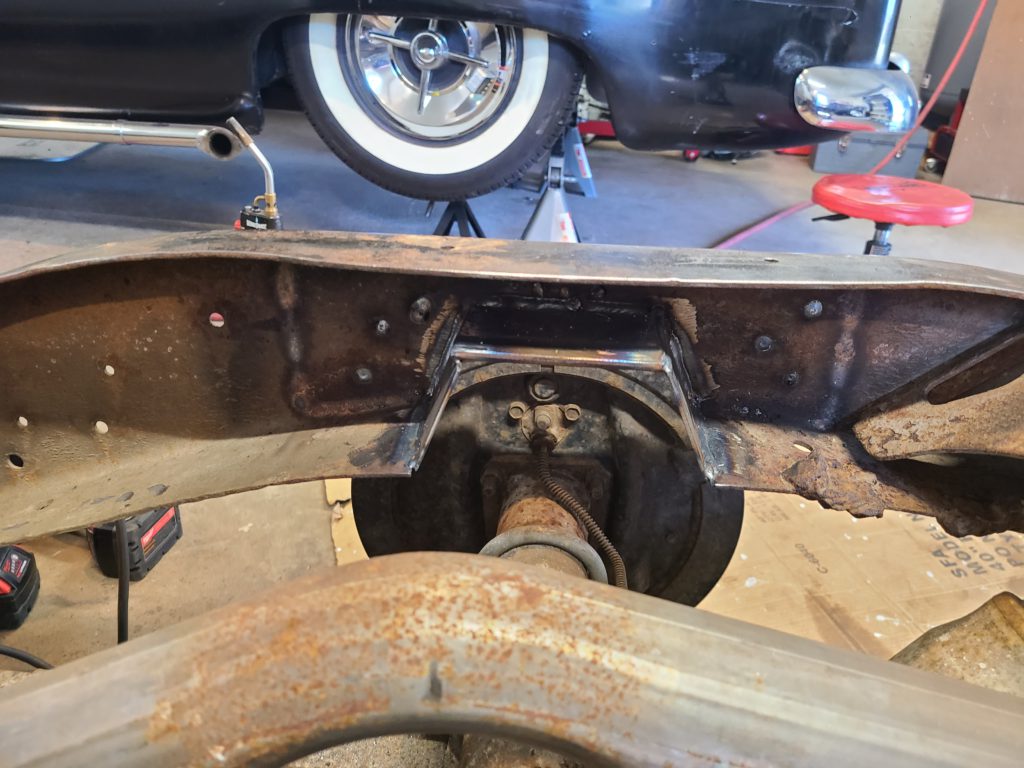
Every Hacks Best Friend: Cardboard!
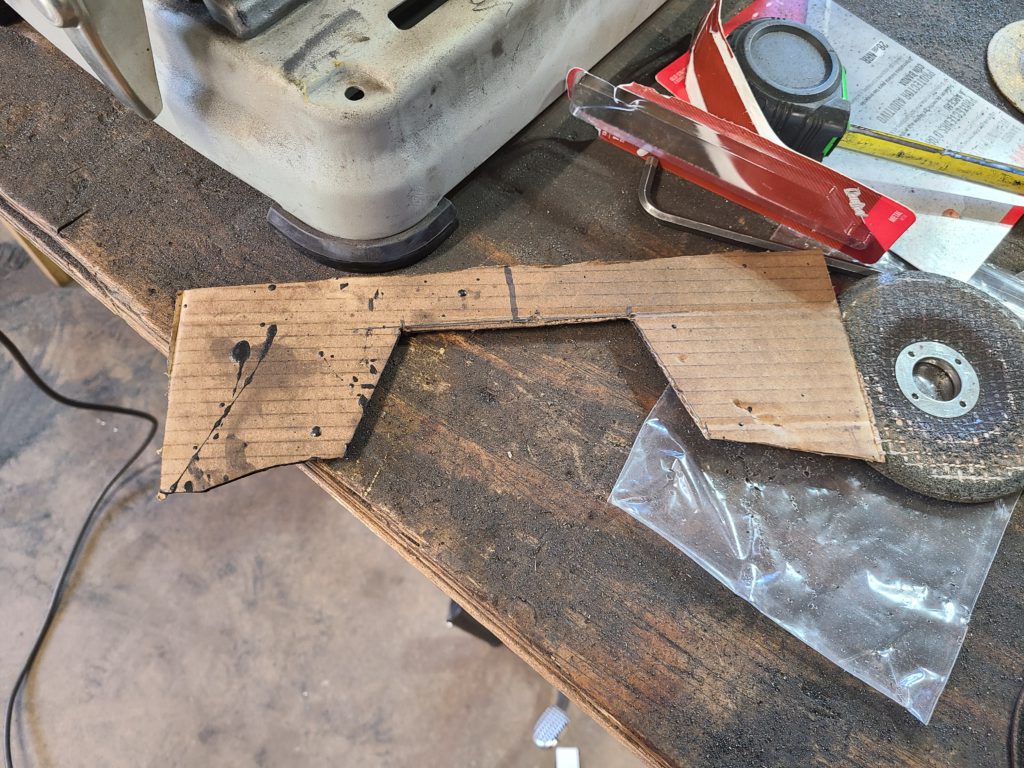
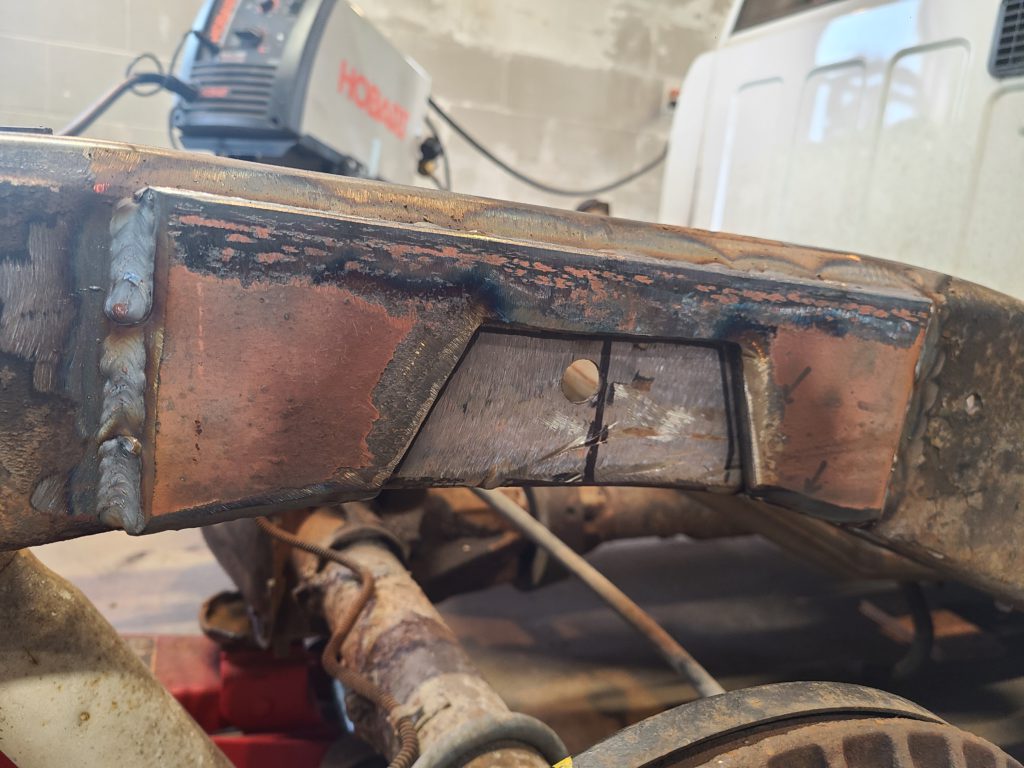
Next up, make your Notch template. This will double as a template for your cut, as well as a template for your fish plate/strengthening plate.
Notice the center mark on the cardboard as well.. so i can line it right up. This is also where you get to choose how wide to make your notch. I went 4” at top, 6” at bottom.
Hold this up to your frame a few times… take a beer break, then come back and hold it up a few more times. Make sure its exactly what you want and where you want.
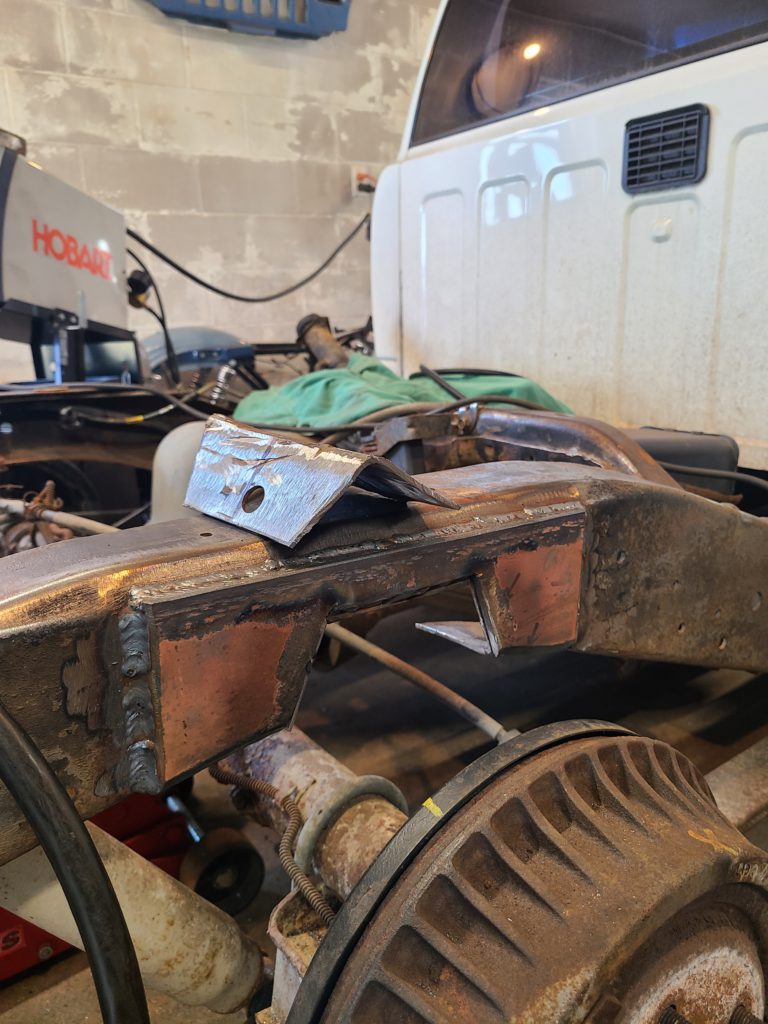
Once good, take the template and make your fish plate.

So.. when your best friend is in the sheet metal union and says “I have some free drops”.. you use them lol. Yes, this is WAY THE FUCK overkill thickness wise, but it was free, so rock on!!
If you’re like me and don’t have the advantage of a plazma cutter or torch.. grab a beer and your favorite death wheel and sawzall blade and start the party.
Ain’t no Party Like a Welding Party
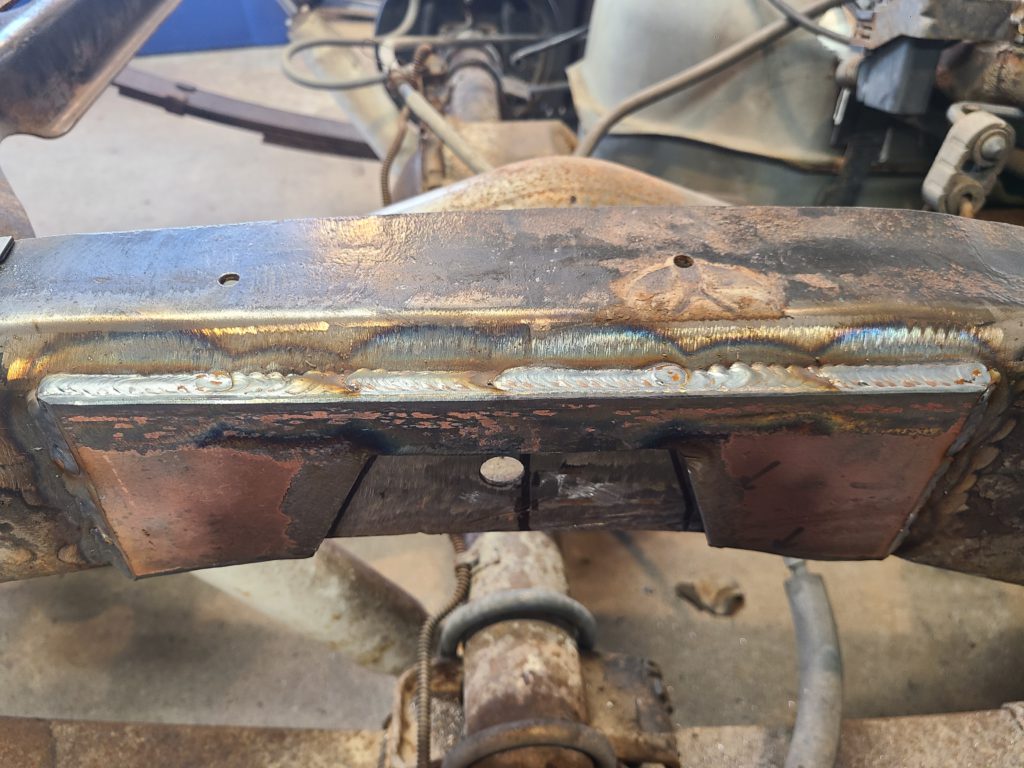
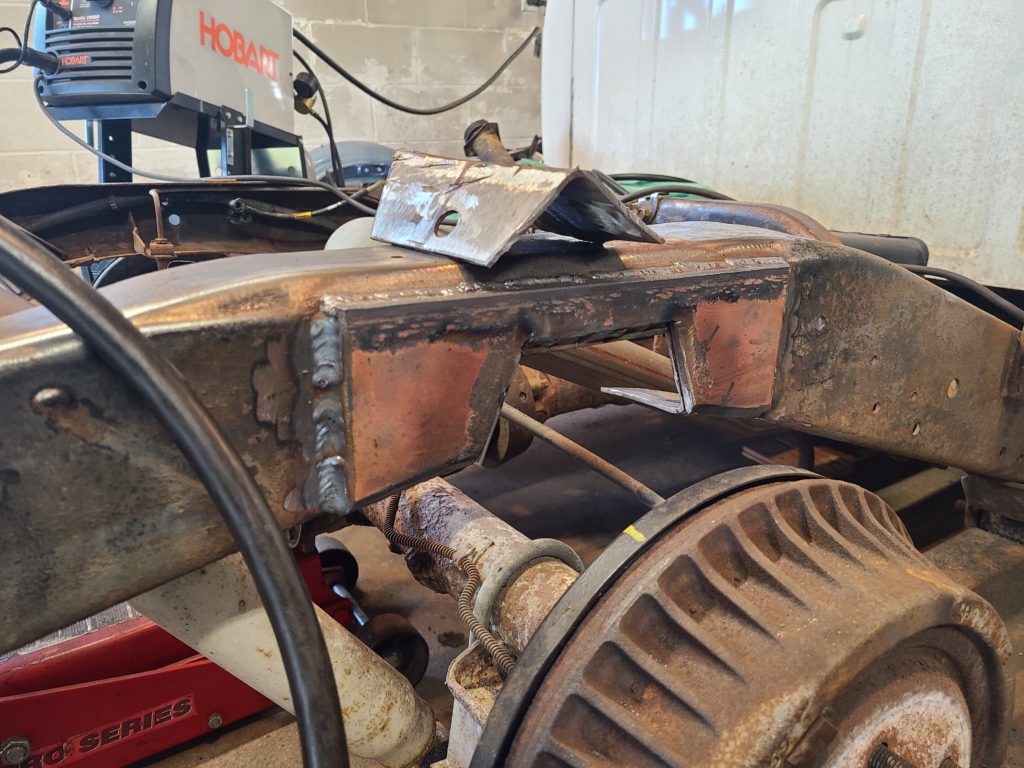
At this point, tack the plate in place, measure one last time… then burn baby burn! And before you bust my balls… I’m no pro. I’m pretty-ok at making things stick to other things, so yes, I’m confident its burned in. Not pictured here: I drilled a number of holes on the inside of the frame rail and rosette welded to the fish plate.
Once welded in good, grab a beer, say a prayer, then grab your best sawzall blade and start cutting the inside out.
Now pat your self on the back, have a beer, and take a break (damn, how many beers are we up to now?? This is why shit takes me so long in the shop).
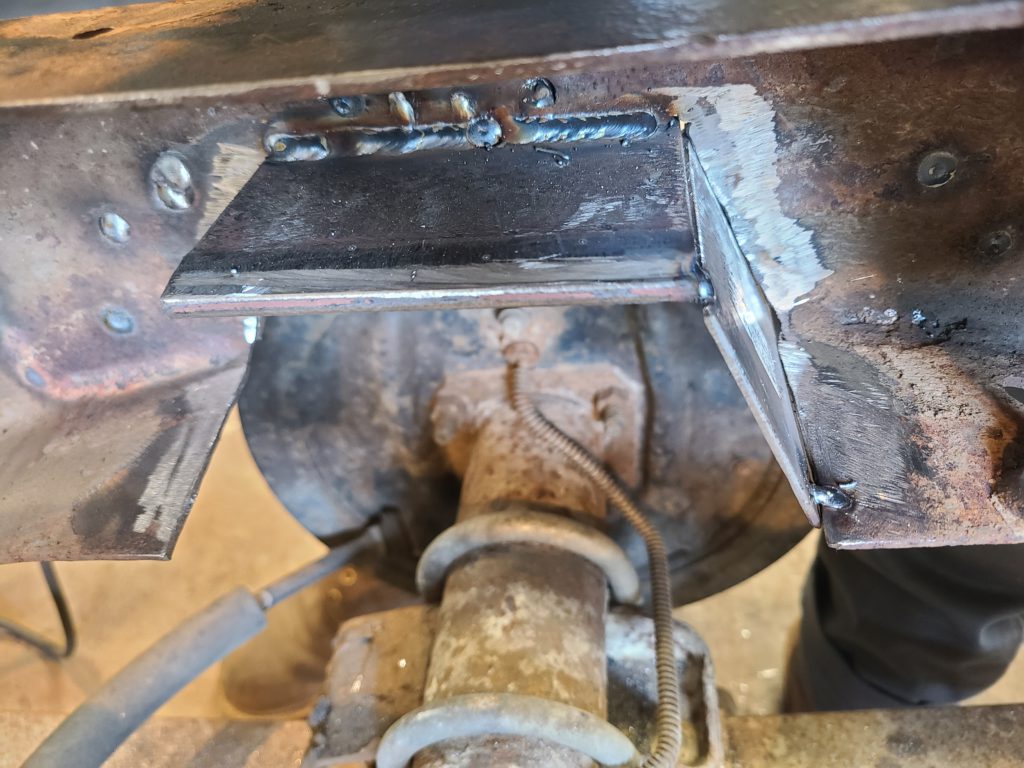
With some scrap 1/4” and 1/8” plate, I finished up the notch. Not pictured here, i also fully boxed the top of the notch, so i could eventually add a bump stop and not worry about bending things.
Evap Canister Relocation

So here’s the bad news… i somehow ‘forgot’ to take pics of the evap relocation.. maybe because of all those aforementioned beers. This is the best i have.
The Evap canister was right above the drivers side axle in the frame… obviously not a great location. I cut the whole steel tray it was in off and re-welded it to the gas tank X-member above the muffler. I did have to lengthen 2 of the hoses, but nothing crazy. And before you yell about it being too close to the exhaust, check out a new Jeep JL’s and tell me you cant put them close to the exhaust… and those are all plastic.
The Finished Product
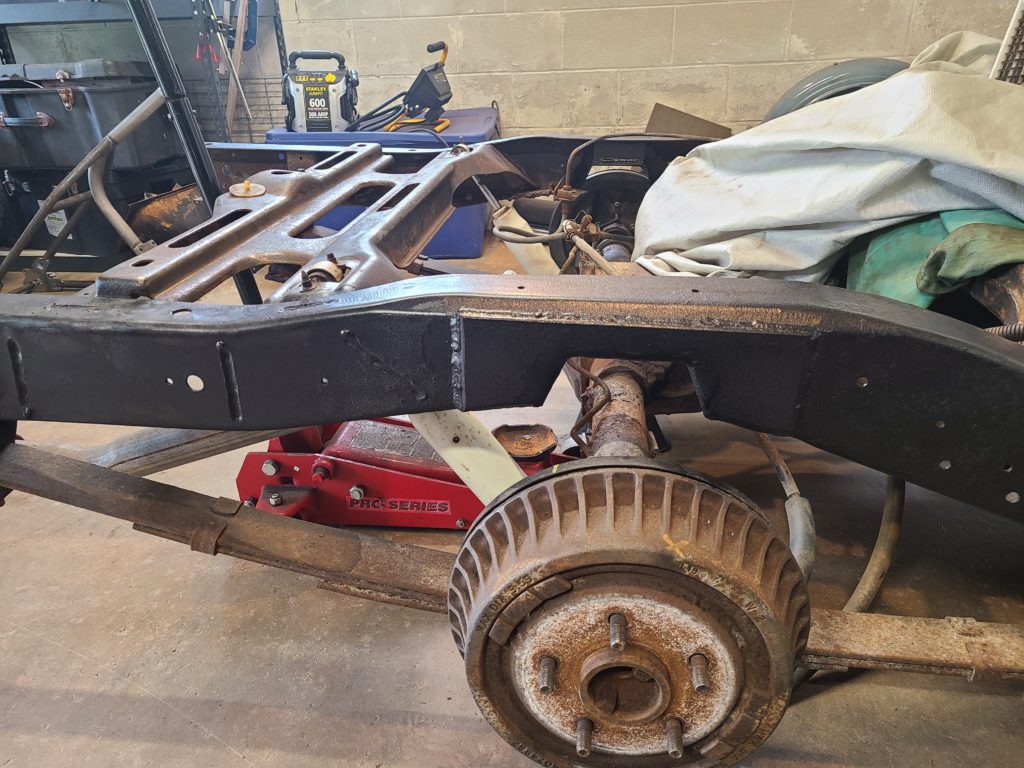
Not fancy, but not bad. It should fix my existing clearance issue and give me room to grow!
Thanks for suffering through my rambling!